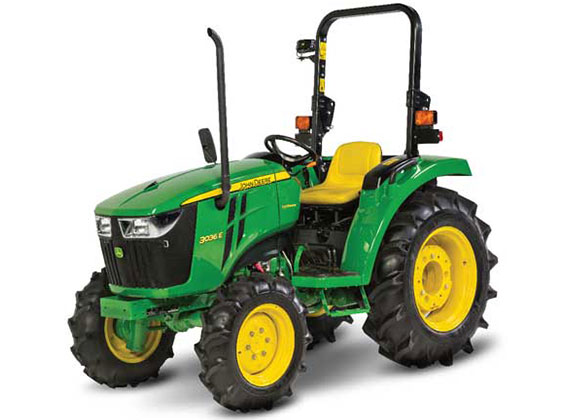
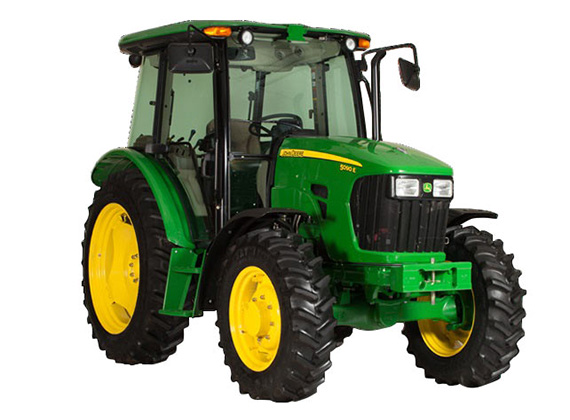
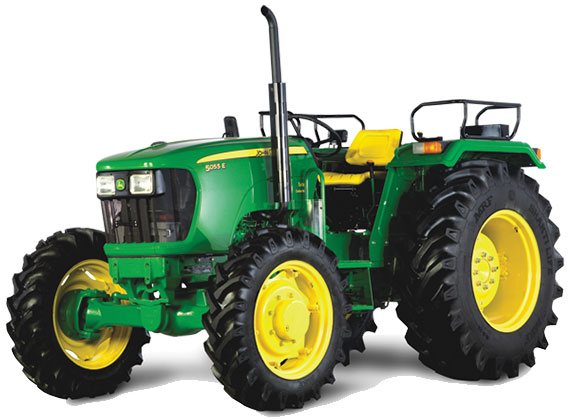
The H240 Loader offers 5E Series Tractor operators a durable and reliable loader for moderate-duty work. It is available in self-leveling and non-self leveling configurations and includes a loader suspension system for improved productivity. Quik-Park™ stands make it easy to attach and remove without tools. And concealed oil lines improve visibility while reducing the potential for damage.
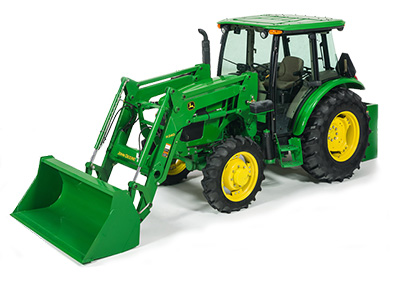
Features
- Available single-point hydraulic connection saves time
- Hydraulics that improve cycle times and productivity
- Integrated parking stands for easy attachment and removal
Key Features
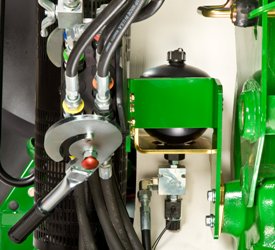
Nitrogen-charged accumulator and electric valve

Operator on/off switch
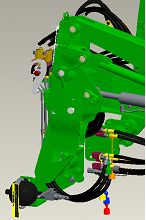
LSS on H180
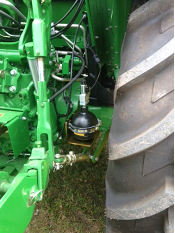
LSS on 5E and 5M
An enhancement to the loader is the suspension system. A great level of loader productivity is achieved with the LSS.
- An accumulator charged with nitrogen and connected to the head-end lift cylinder hose through a T-fitting provides shock absorption
- The cylinders move in and out to allow the boom to float
Performance
- Bales can be transported more efficiently from one end of the field to the other over frozen, hard-packed, or rutted terrain.
NOTE: Check bale handling capability of tractor before use.
- Pallets can be moved easily without sustaining cargo damage
- Pallets of seed or fertilizer can be carried across a yard without a bag spilling and creating a costly mess
- Properly ballasted tractor with LSS has increased stability, creating a smoother ride for the operator
Cost of Ownership
- Extended life of loader pins and bushings
- Less stress on tractor axle
Reasons for turning LSS off include:
- Digging applications - With LSS on, the cylinders retract slightly, losing lifting power
- Holding a grade when blading - With LSS on, it is difficult to hold a constant grade
- Precise pallet and bale handling - With LSS on, the load moves up and down slightly while being positioned
- Parking a loader - With LSS on, when down pressure is applied, the lift cylinders retract slightly, making it more difficult to park
The switch is conveniently located in the operator station to avoid having to exit the operator station to manually move the handle on the LSS.
LSS can also be ordered with a manual shutoff. Depending on the tractor/loader model, the accumulator is located in different places. On the H180 the accumulator is mounted outside the bottom of the mounting frame. On the 5 Series tractors, the accumulator is mounted near the inside of the rear right wheel. On 6 series tractors and larger, it is mounted in between the hydraulic connection and the mounting frame.
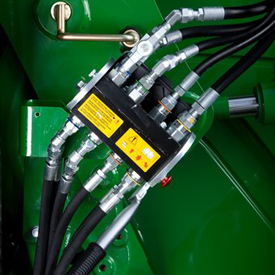
Single-point hydraulic connection on row crop tractor (closed)
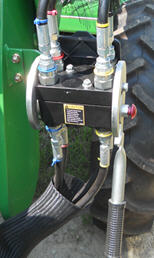
Single-point hydraulic connection on utility tractor (closed)
The H240, H260, and H310 Loaders can be ordered with a single-point hydraulic connection that also incorporates the connection point for any electrical needs. To disconnect the hydraulic connection between the loader and the tractor, it is necessary to relieve the hydraulic system oil pressure on the tractor.
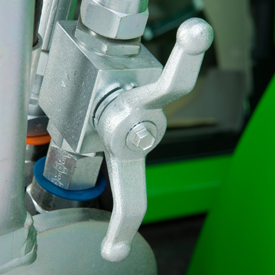
Hydraulic shut-off valve (open position)
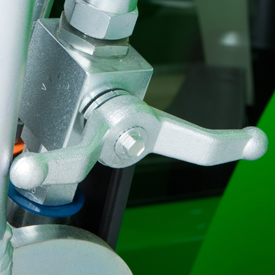
Hydraulic shut-off valve (closed position)
A hydraulic shut-off valve is included with the H-Series Ag Loaders to ensure the loader does not lower suddenly. For example, this allows the boom to be locked out when someone is required to be located under the loader boom for service work on the tractor. It should not be used for extended periods of time unless an appropriate support stand is also utilized.
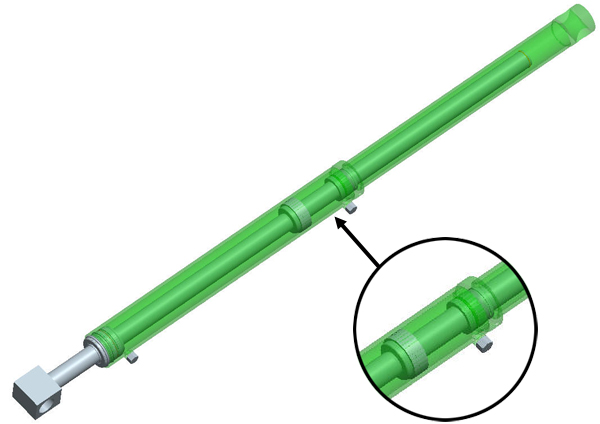
False rod cylinder
Fast bucket cycle times are important to dump the load from the bucket as quickly as possible, (quite often) in order to be as productive as possible, while completing loading operations. The bucket cylinder design can have a major impact on this cycle time, especially for the mechanical self-leveling loaders.
Therefore, all MSL H-Series Loaders utilize false rod bucket cylinders. A false rod cylinder has a smaller displacement of oil requirement on the head end of the cylinder, which allows this cylinder to dump much faster than a normal cylinder.
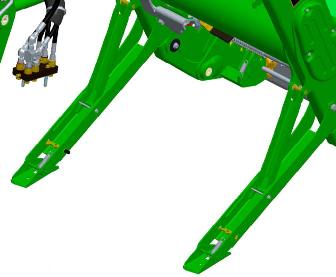
Parking stands
John Deere loaders are easily removed and reinstalled on tractors without tools. The parking system allows removing or attaching the loader to the tractor in minutes without the need for tools.
To remove or park the loader, apply slight down pressure to the loader boom with the bucket dumped at approximately a 30-degree angle. With the tractor in park, lower the parking stands and place the mast pins in the open position.
Removing or parking the loader
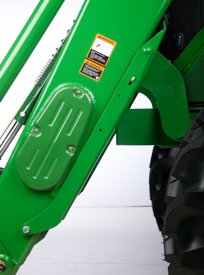
Parking stand in stored position
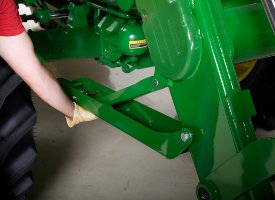
Removing parking stand
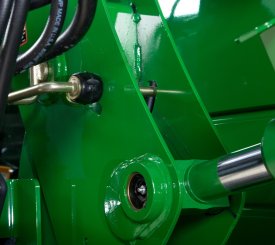
Mast pin in the closed position
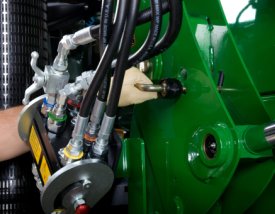
Rotating mast pin to the open position
Utilizing the boom circuit with the tractor in neutral, rotate the mast forward until the mast has rotated past the pin location on the mounting frame by extending the lift cylinder. Now using the bucket circuit, roll back the bucket until the mast is removed from the pocket and will clear the tires.
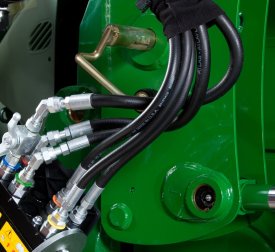
Mast pin in the open position

Masts rotate forward, then bucket rolled back
With the tractor in park, shut the engine off and relieve the hydraulic pressure as indicated for the tractor (rotating the joystick). Disconnect or open the single-point hydraulic connector (or remove couplers if no single point is installed).
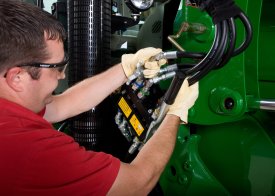
Disconnect/open single-point hydraulic connection
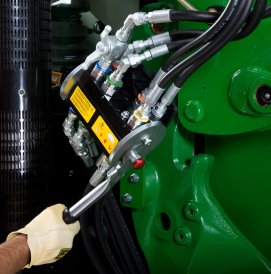
Disconnect/open single-point hydraulic connections
Store the loader half of the single-point connector or hoses, and back away from the loader.
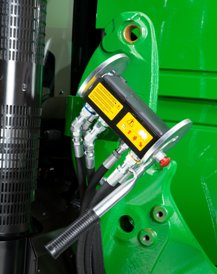
Single-point hydraulics disconnected
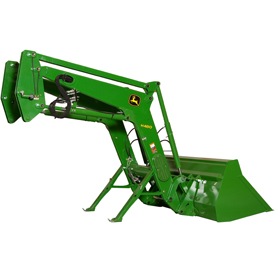
Parked loader
Attachment Carrier
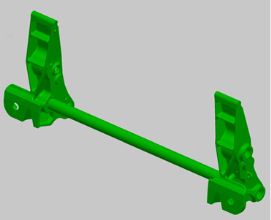
John Deere 500 Carrier
This carrier is built with cast nodular iron which provides strength and durability for loader operations.
This carrier is designed for operations that have existing 500-style attachments and do not want to convert to the global carrier.
This is only recommended for operations that have customer attachments that cannot be easily converted to the global style. The John Deere 500 Carrier is not compatible with 6-Series Tractors.
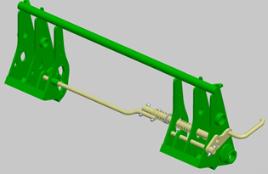
Global carrier
The carrier features an attaching system for fast connection of attachments.
NOTE: Some model loaders require lowering the boom and rolling back the attachment to lock the carrier in place.
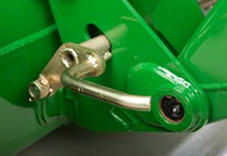
Carrier latch handle in the open position
To remove an attachment, the loader must be positioned so the attachment is approximately 150 mm to 250 mm (6 in. to 10 in.) off the ground and rolled back slightly to minimize loading on the retaining pins at the location the attachment is to be left. The carrier latch handle is moved to the open position, and then the operator simply dumps the attachment forward and lowers it to the ground.
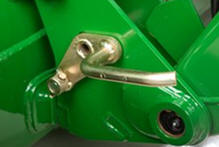
Carrier latch handle in the closed position
To connect to another attachment, the operator dumps the carrier fully and engages the hooks of the attachment. The attachment is then rolled back slowly to allow the spring-activated latch pins to engage. Always ensure the latch pins are fully engaged prior to use of the attachment.
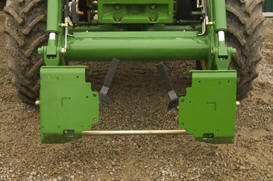
Skid steer carrier
The skid steer attachment carrier allows the use of skid steer-type attachments. One person can quickly change attachments without the use of tools by simply rolling the attachment back, lifting the levers, and then rolling the attachment forward and lowering to the ground.
Mounting Frame
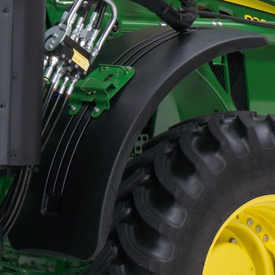
Stationary fender (H480 shown)
Loader stationary fenders are highly recommended for those operating in conditions where the front axle will be in full oscillation and turn frequently or where tight turns are made while maneuvering through gates or obstacles that will catch tractor axle-mounted fenders.
The loader stationary fenders still provide coverage for debris from the tire, but they do not protrude to become damaged in operation. The fenders can be removed to enable better access for servicing as well.
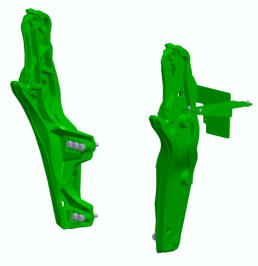
5M mounting frame
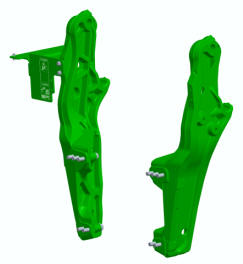
5M mounting frame
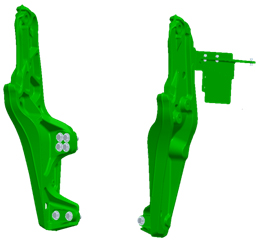
6D (IT4; model year 2013 and newer) mounting frame
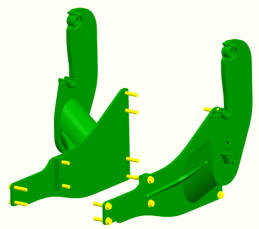
6D (model year 2012 and prior) mounting frame
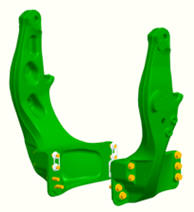
6M (small chassis), 6R (small chassis), 6030, 6030 Premium, 6020, 6010, 6000 Series Tractors mounting frame
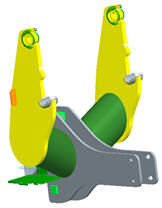
5E 4 Cylinder (IT4; 5085E, 5100E) mounting frame
Mounting frames are designed to evenly distribute forces during loader operation. Hardware is accessible to torque to the correct specifications.
Hood Guards
The hood guard's basic function is to:
- Help protect the tractor grille and hood from falling debris or stationary objects, such as a wagon or mixer, while loading
- Allow for lighting at night
- Can be used with or without the tractor front weight bracket but not with the actual front weights while using the loader
- Cannot be used with a front hitch
It is highly recommended to purchase a front weight bracket when using a loader. The hood guard is designed to be slightly rearward of the front weight. This is so the front weight is the first point of contact against lower stationary objects.
Hood guard for 5E Interim Tier 4 (IT4) 4-Cylinder Tractors
The hood guard's basic function is to:
- Help protect the tractor grille and hood from falling debris or stationary objects, such as a wagon or mixer, while loading
- Allow for lighting at night
- Can be used with or without the tractor front weight bracket but not with the actual front weights while using the loader
- Cannot be used with a front hitch
It is highly recommended to purchase a front weight bracket when using a loader. The hood guard is designed to be slightly rearward of the front weight. This is so the front weight is the first point of contact against lower stationary objects.
The basic functions of the hood guard are:
- Help protect the tractor grille and hood from falling debris or stationary objects such as a wagon or mixer while loading
- Allow for lighting at night
- Can be used with or without the tractor front weight bracket but not with the actual front weights while using the loader
- Cannot be used with a front hitch
It is highly recommended to purchase a front weight bracket when using a loader. The hood guard is designed to be slightly rearward of the front weight. This is so that the front weight is the first point of contact against lower stationary objects.
Buckets
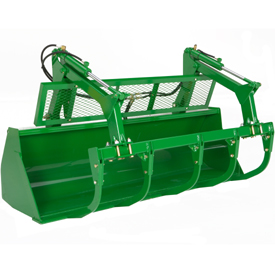
Five-tine round bale/silage grapple with grille
All of the H-Series Loaders use the same five-tine pin-on grapple. The advantages of this grapple are:
- The pin-on method puts the least amount of stress possible on the bucket.
- The grapple has a wide stance, making it more difficult to twist.
High-performance operators will choose the five-tine grapple for its increased durability and load-carrying capacity. Advantages include:
- The ability to handle two large round bales instead of one (where loader capacity allows).
- Strong grapple arms allow the bucket capacity to be increased by almost twice the amount of normal bucket capacity in materials such as silage.
The grapple is equipped with twin cylinders to provide excellent clamping force.
NOTE: The center tine of the five-tine grapple is slightly off center to avoid contact with the placement of optional digging teeth.
NOTE: The grapple is not compatible with materials or high-volume buckets.
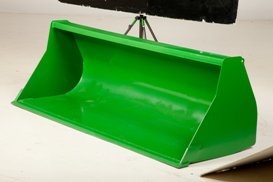
Materials bucket
Materials buckets may be used for loading dirt, gravel, feed, and light materials as well as scraping, digging, and other general-purpose tasks.
NOTE: Materials buckets are not compatible with replaceable cutting edges or digging teeth.
This general-purpose bucket can be used in numerous applications.
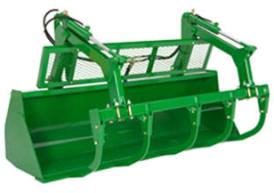
Heavy-duty bucket (shown with grapple)
The high-volume bucket is intended for use with lighter-density high-volume materials. The bucket capacity makes this an effective tool for handling snow, wood shavings, and other loose materials.
Ballasting
Proper ballast is very important. It significantly improves a tractor's stability, performance, and economy in most applications. The use of a tractor without proper ballast, especially for front loader work, is not recommended and should be avoided in order to save an operator time and money.
What is ballast?
In simple terms, ballast is counterweight that is used to improve stability and performance. It is mass added to the tractor chassis and/or wheels to increase total weight and to influence the weight distribution between the front and rear axle.
For loader work, weight placed on the 3-point hitch moves the fulcrum to the tractor’s rear axle. This increases stability and reduces the stress imposed on the front axle caused by only weighting the rear axle.
As a rule of thumb, the following should be maintained:
- A 60/40 rear/front weight ratio for ground-engaging work
- A 50/50 rear/front weight ratio for loader work
Why is ballasting necessary?
Proper ballast maximizes a tractor's overall stability and productivity by keeping all four wheels on the ground. For instance, when doing loader work, rear ballast provides a counterweight for material in the loader bucket. This counterweight keeps the most powerful part of the tractor's drive system, the rear wheels, planted firmly on the ground.
In addition to improving the tractor's performance, proper rear ballast will also maximize the life of the front wheel drive axle, as well as other drivetrain components. For tractors equipped with loaders, signs of improper rear ballast may include premature tread wear on the rear tires, leaking front axle or pinion seals, and premature failure of driveline and front axle components.
Ballasting will also maximize side-to-side tractor stability. When operating on slopes or uneven terrain, proper ballast will lower the tractor's center of gravity, increasing stability. This holds true for open station, as well as cab tractors.
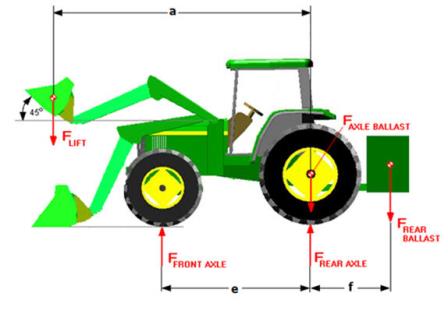
The following illustration gives examples of different ballast situations and the way the added weight affects the tractor.
Ballasting for decreased front axle loader and proper stability
As shown without ballast in the table below, when lifting a load, the front axle loading is greatest and the rear axle loading does not meet the minimum, but the total tractor weight is the lightest. This is the baseline for comparison.
As shown in ballast 2 in the table below, adding ballast to only the rear axle using wheel weights and tire fluid can achieve proper ballasting, but will not decrease front axle loading, and will increase total tractor weight more than necessary.
As shown for ballast 5 in the table below, adding ballast to the 3-point hitch will decrease front axle loading as the loads balance/pivot about the rear axle. This will shift more of the total weight to the rear axle, but also minimizes additional total tractor weight.
NOTE: Always refer to the loader operator’s manual for proper recommended ballasting for stability.
|
Example: reference only |
FLift (kg [lb]) |
FAxle ballast (kg [lb]) |
FRear ballast (kg [lb]) |
FFront axle (kg [lb]) |
FRear axle (kg [lb]) |
Is rear axle load at least 25% of total? |
Percent change in front axle load? |
Percent change in total weight |
|
Without ballast |
1153 |
0 |
0 |
5212 (11490) |
1136 |
No |
Baseline |
Baseline |
|
Ballast 1 |
1153 |
200a (441) |
0 |
5212 |
1336 (2945) (20%) |
No |
0% |
+3.1% |
|
Ballast 2 |
1153 |
560b (1235) |
0 |
5212 |
1696 (3739) (25%) |
Yes |
0% |
+8.1% |
|
Ballast 3 |
1153 |
200a (441) |
200 (441) |
5093 |
1655 (3649) |
Yes |
-2.3% |
+5.9% |
|
Ballast 4 |
1153 |
0 |
200 (441) |
5093 |
1455 |
No |
-2.3% |
+3.1% |
|
Ballast 5 |
1153 |
0 |
315 (695) |
5024 |
1639 |
Yes |
-3.6% |
+4.7% |
|
Ballast 6 |
1153 |
0 |
730 (1609) |
4777 |
2301 |
Yes |
-8.3% |
+10.3% |
a = wheel weights only
b = wheel weights with tire fluid
How to ballast
How a tractor should be ballasted depends on the application. Weight can be added to a tractor in several ways:
Front: Front weights attach to the front of the tractor and provide a counterweight for heavy 3-point-hitch-mounted implements. Front Quik-Tatch™ weights can be easily attached to the front of the tractor and removed when not needed.
NOTE: Front weights cannot be used in conjunction with a loader.
Rear: A ballast box loaded with weight (sand, concrete, Portland cement, etc.) can be mounted to the 3-point hitch for quick and easy ballast when needed. Reference the chart below for approximate weights when using the ballast box. A 3-point-hitch-mounted implement can also be used for ballast, but it must meet the specified weight requirement.
Rear wheel weights are considered more permanent and attach directly to the rear wheel.
Liquid ballast like calcium chloride (which prevents freezing) or water can be added to the rear tires.
Ballast box capacity
| Capacities | ||||
| Weight | Sand (dry) | Concrete sand | Portland cement | Volume |
| BW15852 large ballast box: | ||||
| Material | 581 kg (1277 lb) | 871 kg (1915 lb) | 1089 kg (2395 lb) | 13.3 ft3 = 377L |
| Empty box | 155 kg (342 lb) | 155 kg (342 lb) | 155 kg (342 lb) | |
| Total | 736 kg (1619 lb) | 1026 kg (2257 lb) | 1244 kg (2737 lb) | |
For more detailed information on ballasting, refer to the sales manual or tractor and implement operator’s manuals.
Hydraulic Connection, Hoses and Parts
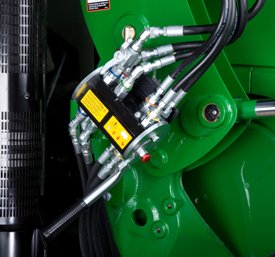
Single-point hydraulic connection on row crop tractor
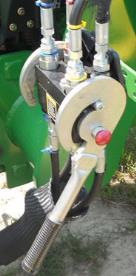
Single-point hydraulic connection on 5E Series Tractor
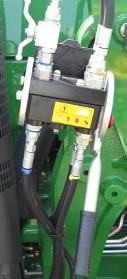
Single-point hydraulic connection on 5M Series Tractor
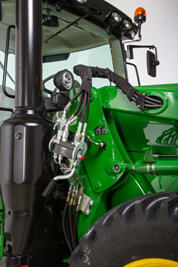
Single-point hydraulic connection with rigid lines on FT4 6R large frame
The H240, H260, H310, H340, and H360 Loaders feature a single-point hydraulic connection that also incorporates the connection point for any electrical needs as well. To disconnect the hydraulic connection between the loader and the tractor, it is necessary to relieve the hydraulic system oil pressure on the tractor.
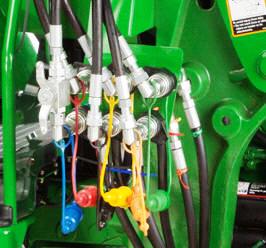
Quick-couplers
The H240, H260, H310, H340, and H360 Loaders feature two-function quick-couplers in base machine. To disconnect the hydraulic connection between the loader and the tractor, it is necessary to relieve the hydraulic system oil pressure on the tractor.
Three function
The H240, H260, H310, H340, and H360 Loaders can be equipped with three-function quick-couplers. Hoses will be installed in the boom arm and just the couplers will need to be assembled along with the third-function bracket and oil line. To disconnect the hydraulic connection between the loader and the tractor, it is necessary to relieve the hydraulic system oil pressure on the tractor.
Loader Configuration

Boom casting
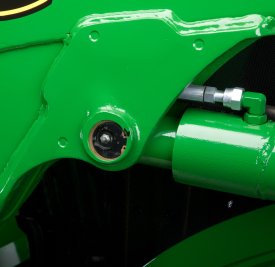
Knee casting
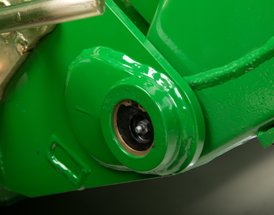
Foot casting
The main structure of the loader, the boom is designed to maximize visibility for the operator to be able to complete their task easily and to provide sufficient strength to withstand years of rugged use. The boom is manufactured utilizing formed C-sections that are seam welded to create structurally sound tapered boom sections.
The front and rear boom sections are then joined at the knee with the rear section overlapping the front section to create a stronger joint versus just butting them together and using an overlapping plate to connect the two sections. At the torque tube, the boom sections are connected.
Cast-steel components are utilized at all the major boom pin connecting points, including the front section of the boom at the foot, in the rear boom, at the mast, and at the knee where the lift cylinder is connected. The reason for this is to provide a superior pin connection. This is accomplished for two main reasons:
- Pin alignment
- Ability to reduce the pin stress loads
Firstly, the ability to machine the pin hole completely from side to side rather than using welded-on bushings ensures superior pin alignment and thus less stress loading. Secondly, the part is able to connect to the boom with a greater surface area, again reducing stress concentrations. These cast components provide superior alignment and longer life than traditional bushing-type joints.
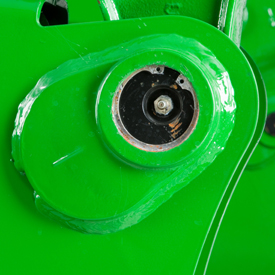
Easy-to-access end-of-pin greasing
The H-Series Loaders feature end-of-pin greasing in all appropriate pin locations.
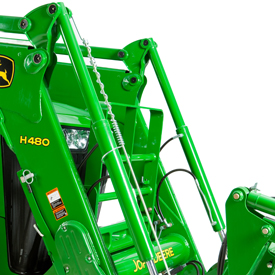
Side view of the bucket-level indicator (H480 shown)
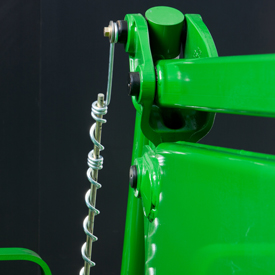
Operator view of the bucket-level indicator
A bucket-level indicator is included in base equipment:
- Located on the right-hand bucket cylinder
- Aids the operator, along with the flat top of the bucket, in determining the bucket-level position
- Does not require adjustment to indicate the level for various attachments
The bucket-level indicator has been redesigned to incorporate two tightly curled positions to signify the bucket and pallet fork level points. Now the rod can be seen at all positions and marked for any attachment-level position. This design eliminates freezing from occurring that causes failure of the indicator.
When the level indicator rod is even with the top of the lower coil cluster, the bucket is level. Attachments such as pallet forks are level when the top of the rod is aligned with the upper coil cluster.
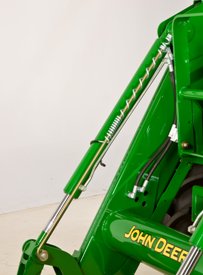
Bucket-level indicator
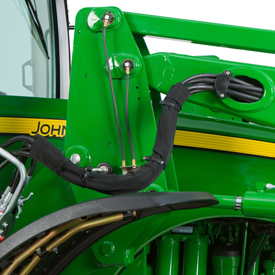
H480 Loader mast shown (right-hand side view)
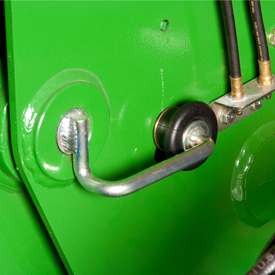
Mast pin right-hand side view
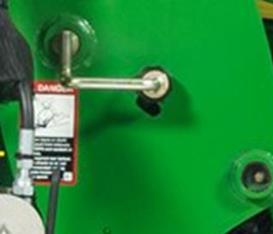
Mast pin right-hand side view
The mast of the loader provides the connection between the mounting frame on the tractor and the loader boom. The connecting points are located in the mast, allowing the loader to be removed or parked from the tractor. The lower fixed pin of the mast rests in the hook of the mounting frame, and the upper pin is secured in place through the mast and mounting frame.
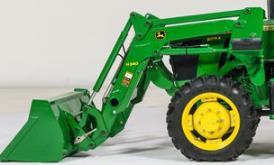
H240 loader mast
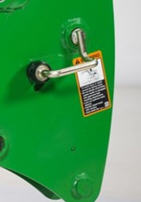
Mast pin left-hand side view
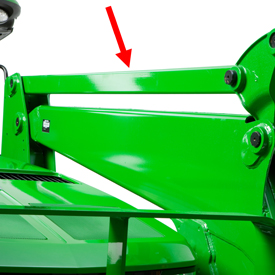
Low-profile self-leveling linkage (H380 shown)
The H-Series Ag Loaders have a MSL loader that provides added lift capability as compared to a non-self-leveling (NSL) loader. This is due to the mechanical advantage the linkage provides. It also ensures the load remains at the same angle to the ground through the arc of travel from the ground to full lift height. The low-profile self-leveling linkage is sized to ensure long life and maximize operator visibility.
The H240 Loader is available in both non-self-leveling (NSL) and mechanical self-leveling (MSL) to meet various needs. It is available with either two-function or three-function hydraulics.
Product features are based on published information at the time of publication. Product features are subject to change without notice. Contact your local John Deere dealer for more information.


